
Both costumes were commissioned pieces. In each of the the costumes, the style was informed by music choice and performance sequence. The coach had a general inclination for what he was after. I then took what he had told me, and translated this into a costume made to move, stretch and twist.
Invisible zipper placed along front. While I previously wanted to put this on the side, it was requested that the costume had to be made for an easy slip on method Jason could do himself. Keeping this application clean became a priority since it was dead center front.
Single straps with snap to replace previous velcro and hook and eye closure. Old pants featured a single strap that would Velcro underneath with a hook and eye on top. Harder to come loose but harder for Jason to hook.

Pant seam serged with double needle sewn on top. Top seams are zig-zaged with a double need ran on top. Gold thread zig-zag on belt holds elastic support. Gathered spandex into cuff, which is double folded and serged for the finish.
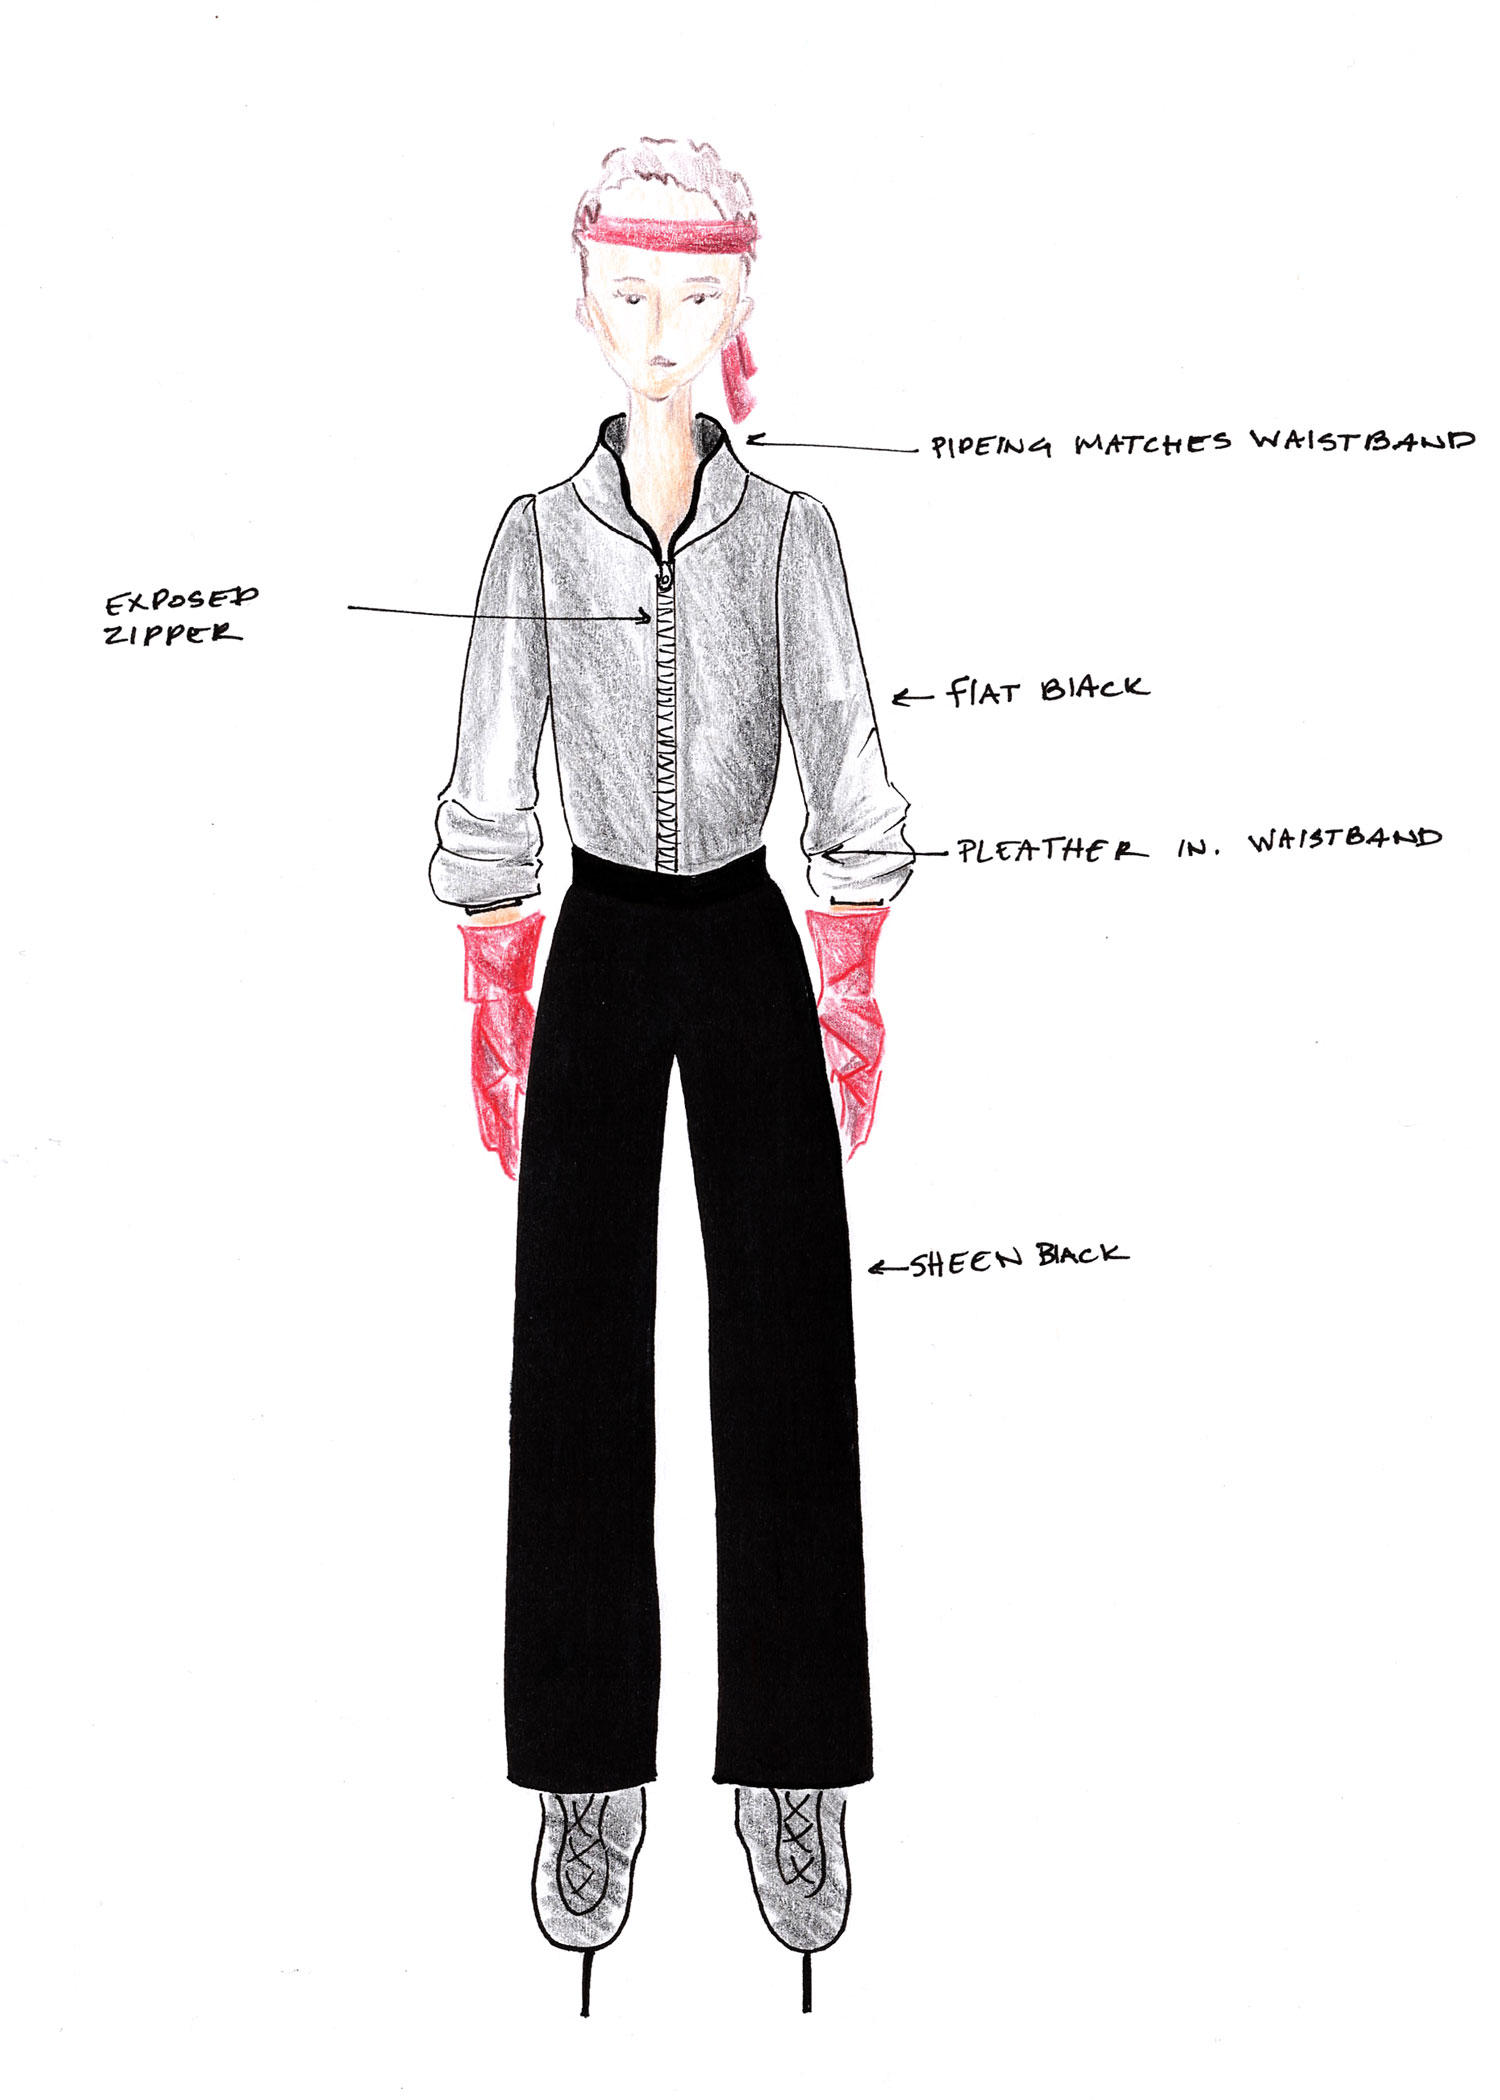
Invisible Zipper Application and serge finished “race collar”. Minimized bulk which quickly becomes visible with a thin spandex material. Outer collar interfaced for shape purpose.
The challenge with this assignment is pure construction. Working along side the coach, who has seen many costumes in his lifetime, would sometimes suggest things I would never do from the perspective of a sewer. Especially, from one who doesn’t have the experience with working with this material. While there are many types of sewing, this was not one I was completely comfortable with. Especially, when we start putting zippers and such into spandex. Not all spandex are equal either and sometimes the material, even though a spandex, react and hold shape differently compared to other spandex. I found this true, come the 2019, costume which features faux 4-way spandex leather and faux 4-way rubber.
While these costumes may appear simple, there is quite a lot of detail and consideration for every seam. Things such as, zipper installation: invisible and exposed, collar construction, interfacing spandex, basic seam construction (because you can’t just use a straight stitch on a machine, it will always pop,) piping, and even the straps around the skate. The boy (Jason) is 14, 15 years of age and this isn’t the type of pattern making I generally do. Little did I know, some other seamstresses I reached out to previous before making the first costume were quite passionate about the reasons why they never touch figure skating costumes, especially for children and young adults who are still growing.
I discovered that you can’t just make spandex binding because it quickly becomes to thick with all of the folding. Since Jason was going to skate with the zipper, half zipped up, I had to finish the zipper tape cleanly. I thought maybe I’d just hong kong the seam but in the end, decided to use black ribbon. Worked lovely with no extra bulk since the ends are finished on ribbon. The zipper tape has no curved so this was a totally acceptable solution. Also, a cheap solution. A roll of ribbon is about a dollar at Walmart.
What the inside looks like. No need to finish the faux rubber or leather spandex. No need for a linear or placket. It just seams to add bulk, while also making it more challenging to sew on the machine.
I believe maybe one of the other reasons why some of my other references won’t touch costumes comes down to time too. It takes time, and it takes even more time to problem solve any tech issues due to the lack of open source recourses regarding tween figure skating costumes. I made five mock-up tops before beginning the final. Which even on the final, I discovered the collar, isn’t easy to sew. Given the 4-way stretch and the natural curve you are setting the collar into and with spandex piping, the pattern is quick to shift and change length even with basting before hand.
Zig-zag seam with a reverse coverstitch on side seams. Arm hold zig-zag with a coverstitch on top. Cuff seam zig-zag with reverse coverstitch on top. Attached to sleeve with a zig-zag seam and a zig-zag on top. Really helped smooth and flatten the faux rubber seam allowance.
Continued reverse coverstitch on the center back seam. I thought it would be a nice contrast with the matte black. The coverstitch thread is wooly and thick. Reverseing the coverstitch seam also draws a emphasis to the matte-ness of the top. The back of a coverstitch shows more thread.

